RC Visor Kit
I would say this is a fairly difficult installation, which is why I did not offer these DIY kits openly for long time. There are many things that can go wrong: shorting or breaking wires, getting glue on visors, causing film to lift, etc.
Do not bend the visors with film on inside (on concave side). This could cause the tinted film to buckle and release and it is impossible to restore it without a crease. When installing, you must make certain that the film faces out or the issue above will occur.


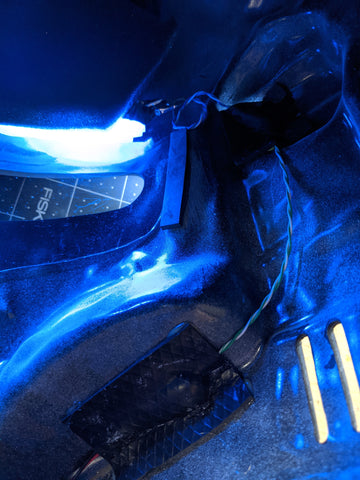
This image shows the installation with mirrored visor removed.
To install the visor, first you must sand the interior of the helmet down to the resin (through any spray paint coating) in the places where you will install the rubber tabs and battery holder. You can use a very rough sandpaper like 60 or 80 grit to do the job quickly. You will want to sand the area to the side of the upper visor about an inch out. The images above shows two rubber pieces holding the bottom of the visor, but only one is needed at the center bottom. It also shows the old battery box. You will need a small cylindrical battery pack like this.
Thoroughly remove the dust from inside the helmet and from visors. Dust shows up really well on the visors.
Place helmet on a soft working surface, like an old towel.
Bend visor to make sure light strip is well adhered and place visor with light strip facing inside the helmet.
Place Medium CA glue on one side of one narrow rubber piece. Be sparing so the glue does not drip on visor. Take care not to drop the piece on the visor. Press visor into the correct position with other hand. Correct position is bottom of visor just covering with overlap of about 1/2". Place rubber to side of visor, not on it, but directly against the side. It should adhere very quickly. If you are good on placement, press into place for 30 seconds. It is best not to get glue on the visor at all so you can remove the visor for cleaning.
Then do the same on the other side, pressing visor firmly into place with other hand. Make sure the bottom of the visor overlaps plastic by about 1/2 inch.
Place silvered visor with film on convex side by sticking into tabs at bottom and pressing. Installing backward (with film in) will cause damage. The silvered visor is made bigger than the tinted visor, so it will probably not fit between the side tabs. Trim a little off the sides with old scissors until it fits snug between the tabs.
Adjust visors to get the look you want. Having the lights about 1/2 inch from the opening is best. I like the white part on the silvered visor to be highly visible.
The rubber rectangle will hold the two visors at the bottom. Press it in place as if you are gluing it to the helmet interior. You will likely want to trim a little off of the visors at the bottom to get good alignment. I usually trim off about 1/4" from the outer visor.
Place glue on half of rubber rectangle and adhere to helmet resin so that it holds the bottom of the visors in place. You want to try not to glue the rubber to the visor in case you need to remove it for cleaning or repair in the future, but even if you bond the rubber to the visor, you will be able to peel the rubber from it if needed provided you do not get too much glue on it.
Make sure that none of the wire ends around the spotlight are in contact to avoid a short. Then, turn on the lights. Do not bend the solid core wires excessively as they can break. Gently press the light into the hole. I usually have it protrude a bit on the outside.
I like to use a little piece of craft foam for the next step. A little one inch square works. Apply a blob of hot glue to one side and gently press it over the wires to lock the led and wiring in place. Try not to cover the back of the LED just yet. If you mess up, do not pull hard on the foam because it can damage the wires. You would have to heat with a hairdryer to reposition in that case.
If you are happy with your placement, then cut another bigger piece of foam to cover the area and make it look neat.
Hot glue a small square of craft foam over the wires where the battery connector wires start to lock the solid wires in place. You can also cover the solid wires with more glue and foam. The multi strand wires should only be covered near the connection to the rest of the wires so you can remove the box to install batteries as needed.
To keep the battery in place, plug it in, place it on the left side in the jaw as far to the center as you can while keeping it fairly flat against the jaw interior. Note where the center of the battery is and then CA glue the velcro battery holder in that spot at the bottom of the valley. Be sure to sand the helmet interior in this spot down to the resin first.
This completes the visor installation.
For comfort, I usually install a strip of 1x1x5 inch piece of foam in the forehead directly above the visor using hot glue. Then I glue a piece of 1/4" thick foam to the bottom of the 1" foam so that it covers (hangs over) the area of visor where it has white paint. Foil tape is show below, no longer used.

This images shows the completed installation
I hot glue in two 1/2x1x4 inch strips across the top of the head. Then glue in some foam at the back of the helmet to help lock it to your head. A 1/4x4x4 inch square of foam works for most people. Make sure hot glue is totally cool before placing it on your head, unless you like glue in your hair. Foam insulates glue and keeps it hot longer.
Less foam is better as you get better airflow. 5V fans can be installed over the side vents and wired to your 5V battery. A toggle switch is recommended for fans so you can turn it off to better hear people while your helmet is on.
Enjoy!